AppSheet vs Airtable: In-Depth Comparison
If you’re deciding between AppSheet and Airtable, knowing their differences is important. Both tools are designed to build apps and manage data without coding. This guide will...
Imagine the number of great apps that were never built just because the person with the idea wasn’t a coder or didn’t have access to developers. A few years ago, if you had a creative idea for an app or software and had no knowledge or experience in coding, you would have to follow a rigid method. You would be independent until you map down the idea but after that, it was a tedious process of either finding a developer, outsourcing the development or learning to code. All of these choices are either too expensive or too time-consuming.
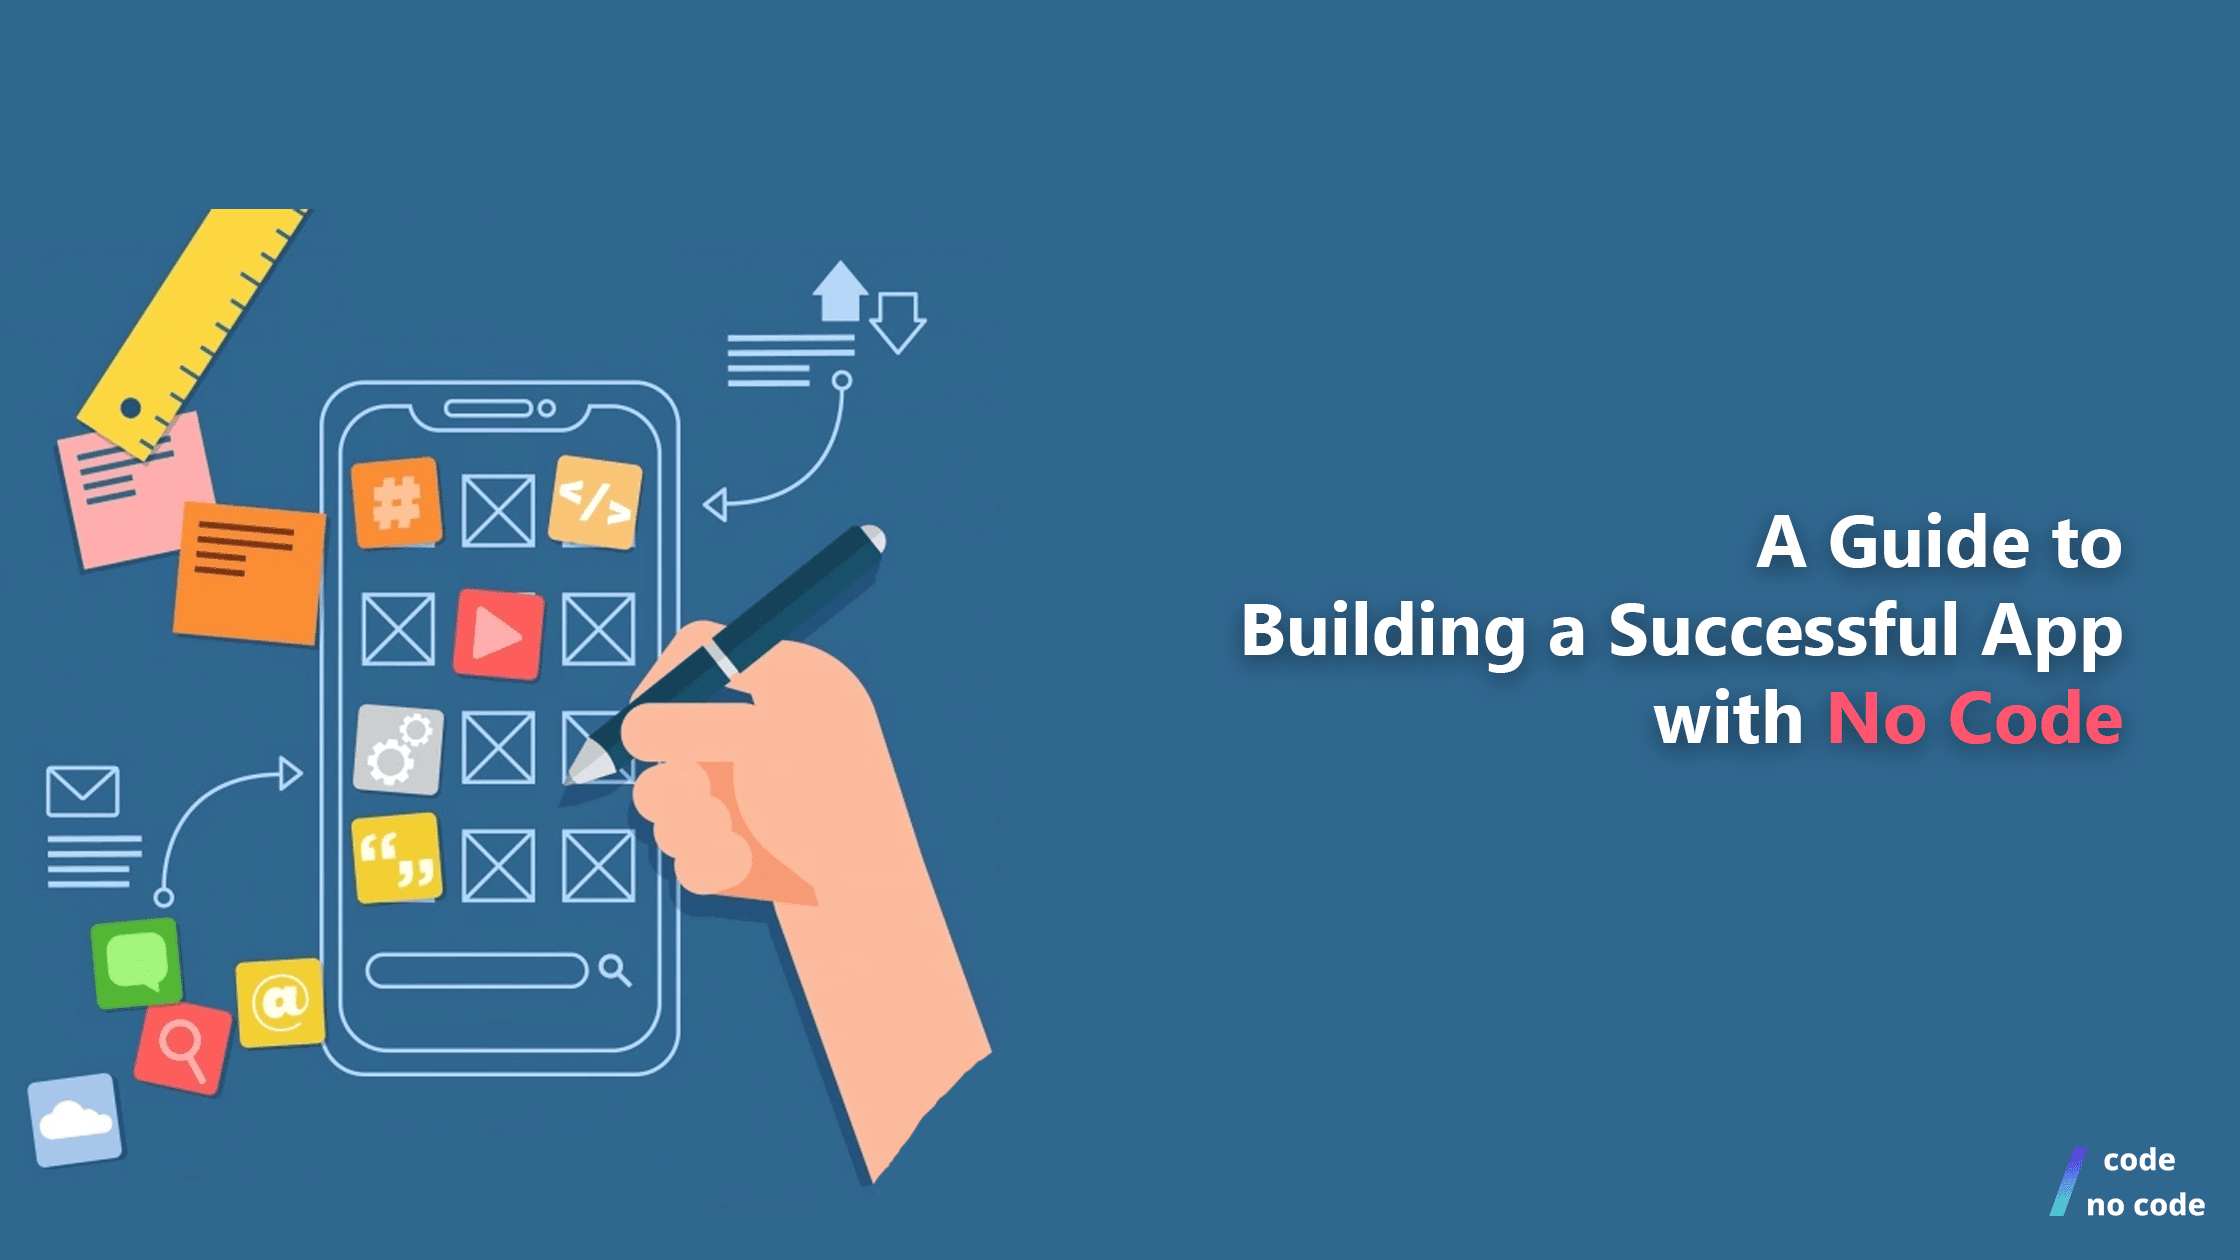
Thanks to tech advancements and the No Code revolution, you can build an app without writing a single line of code. Just like any other process, creating an app with No Code is a step-by-step actionable checklist. Let’s have a closer look at the process of building app with No Code.
The most important step to achieving success with an app begins right here. Currently, your app is nothing but a connection of neurons that gave birth to an idea in your brain. Map down that idea on paper and define what is the exact problem you’re trying to solve. Don’t shy away from taking a bigger perspective here.
For example, the idea of Netflix[1] sparked from a $40 fine. One of the co-founders was fined as he was 6 weeks late in returning the DVD of the movie Apollo 13. (Classic!) He thought what if we could order movies online and get them via mail. His idea was to solve a simple problem that he faced in his daily life. You can get inspiration from your real-life problems and explore them. Here are some actionable tips that might help you zero in on your problem:
Conduct market research – Research the recent trends and thought patterns of the people who are at the top level in your industry.
Take a formal or informal survey – It would help you gain a fresher perspective on your problem when other people can weigh in their opinions. Don’t take criticism or comments too personally.
Write it down – As simple as it sounds, putting things on paper is less about the results than the process of articulation. While writing your problem statement, you will get an idea of what exactly the market needs.
Now that we have our problem statement, half of the battle is won. The next step of building app with No Code is defining the user journey.
User Journey is the step-by-step process of how you want your users to interact with your app. It includes everything from downloading the app to using all of its features.
Let’s have a look at how the user journey of an uber user looks like:
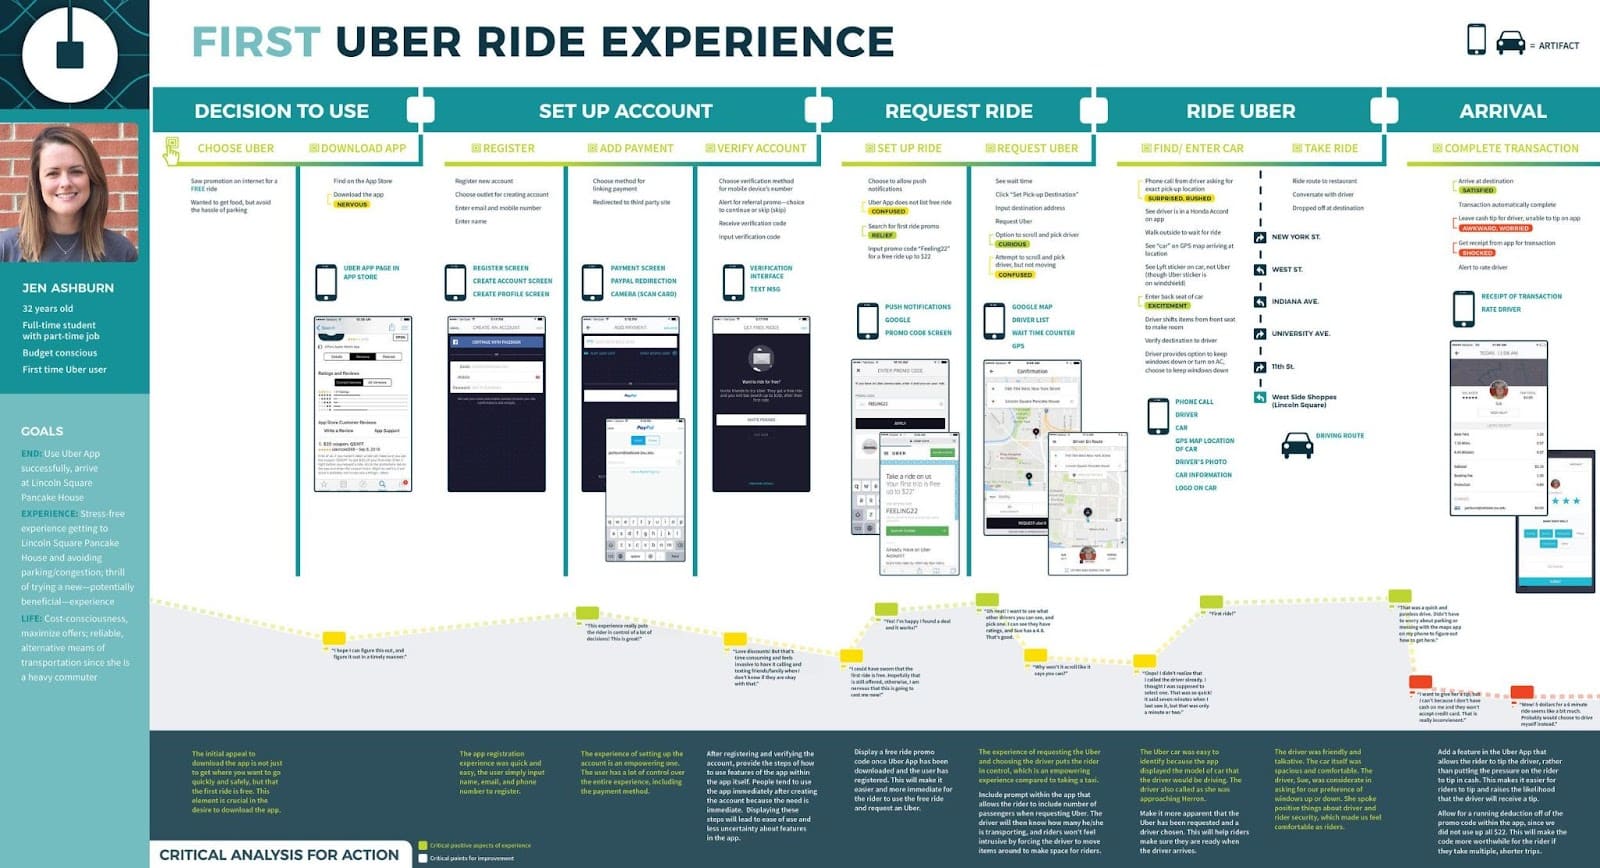
That was a comprehensive example of how a user journey would look like. But initially, you can start simply using flowcharts to define the steps your user is going to take after installing the app.
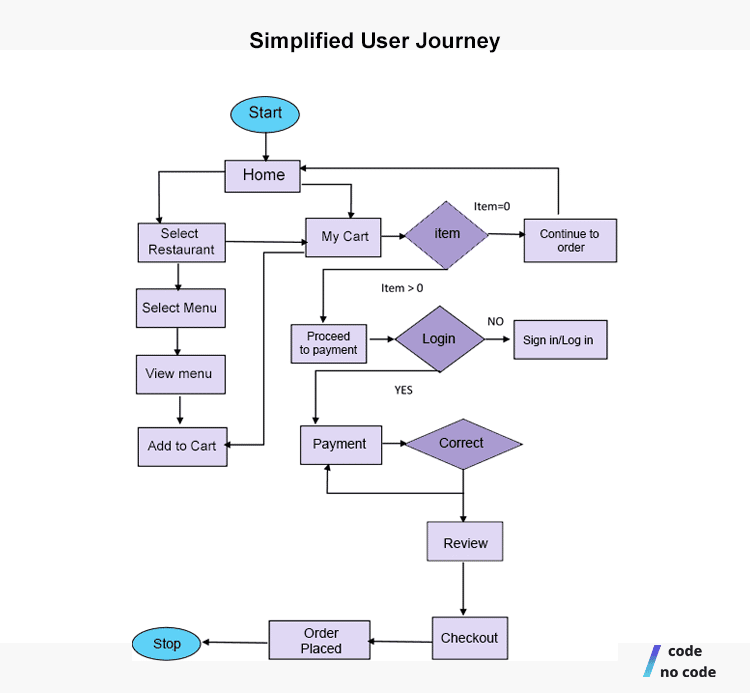
Let’s say your app idea is to develop a food delivery app with No Code. Here is a simplified version of the user journey of your food delivery app.
User stories are the simple descriptions of your features in a layman’s term. When you are building an app, it is vital that you keep your users at a central focus. These user stories help you provide an overview of what you are trying to build from a different angle.
If you are stuck at this step, you can use the following template:
As a {user}, I should be able to {do a particular task } to { gain this result}.
Let’s say if you want to build a user story for a customer of your food delivery app.
As a {customer}, I should be able to {get a notification when my food reaches my doorstep} to {timely get my order}.
You can also use it for an internal customer.
As a {restaurant manager} I should be able to {send a reminder to my top 100 customers} to {boost sales}.
Building these user stories is essential for No Code developers to understand the specifics of your app.
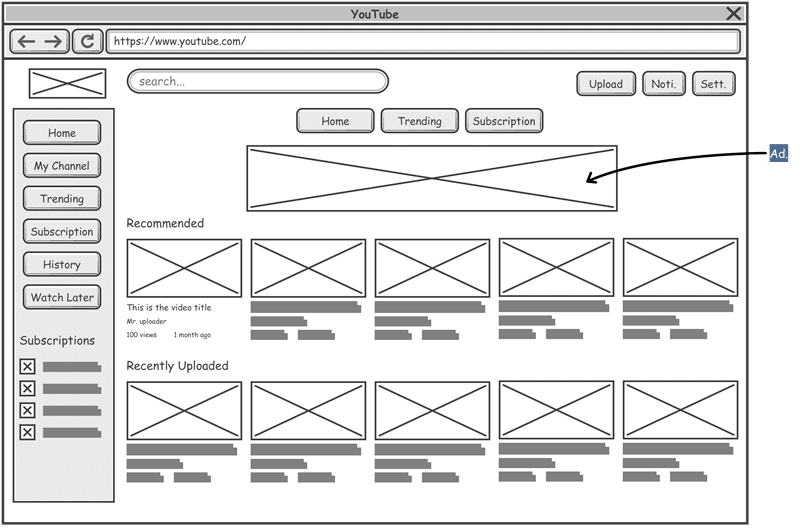
Wireframes are the blueprints of the structure of your app. At times, Developers might use jargon like wires, mockups, or mocks instead of wireframes. Elements such as logos, headers, titles, buttons, and pseudo-Latin text (Lorem Ipsum) are found in wireframes.
Here you have to be creative and design frames or screens of your app that will send the message across to your users. Wireframes are key to a successful No Code app. There are three types of wireframes –
Low fidelity – It has a low amount of details and placeholders for most content.
Mid fidelity – It has specific details about the design and the execution.
High fidelity – It has pixel-level accuracy and most of the placeholders are replaced with the actual text.
Here’s an example of how YouTube’s wireframe would look like:
Once you have a wireframe, you must establish how do you want to store the data of your app. It is important that you have a basic understanding of databases and how to integrate it with No Code. If you want you know more about it, you can refer to this guide on No Code databases.
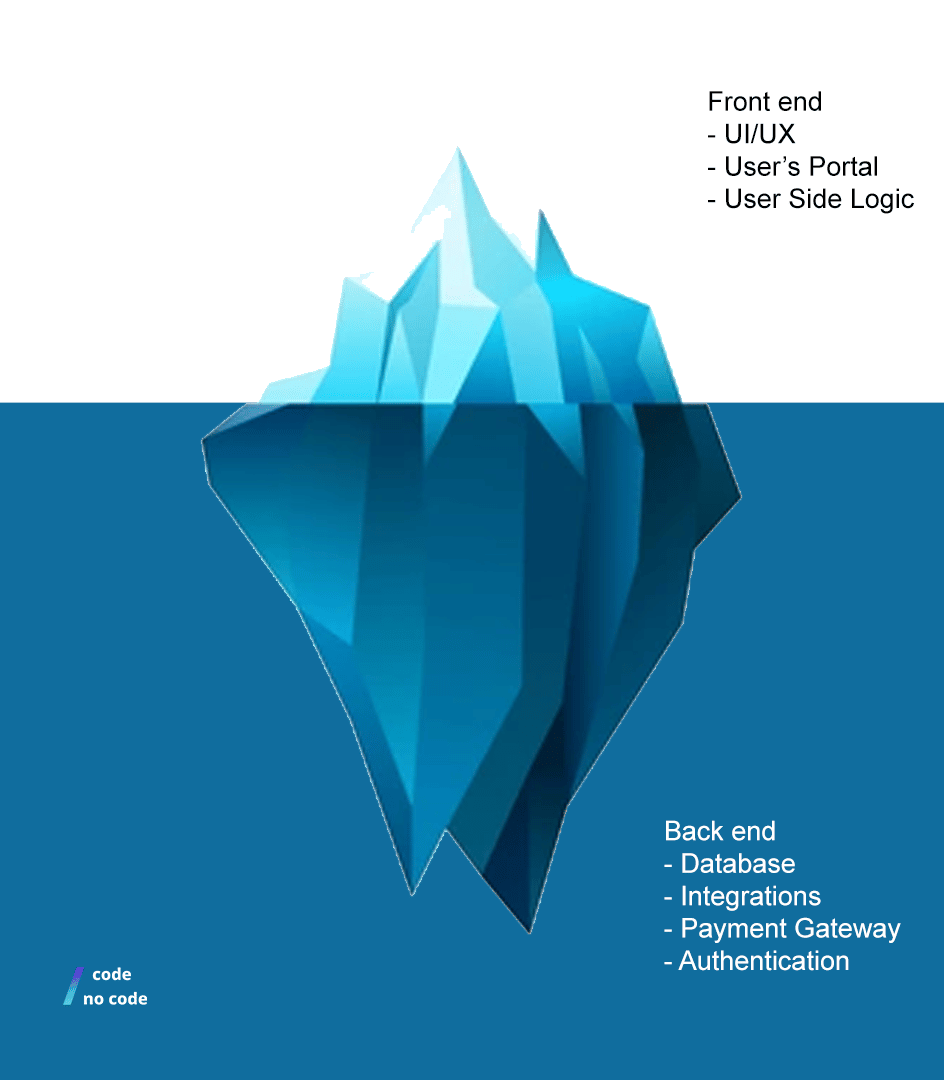
The fundamental structure of the app is created with the backend and front end. Regardless of code or No Code, that remains the same. You can look at it as an iceberg where the top part is the front end and the base is the back end.
Here are some No Code tools you can use for backend development:
Xano helps you develop a back-end that is scalable with a very small learning curve. It is great for new No Code developers trying their hands-on development for the first time. It has a hosted database based on PostgreSQL. It can generate REST API endpoints automatically based on the schema.
Price: The free plan includes No Code builder limited to one workspace with 1000 total records and a rate-limited API.
It is a cloud back-end platform that helps you create a backend without writing code. It supports user authentication, data persistence, file storage, messaging, and custom business logic. They implement these services with the REST API.
Price: The free plan includes unlimited API calls per month with 200 database tables.
This is the last stage of the process of building a No Code app. Creating the Front End is more about design thinking than it is about execution. Design Thinking is the process of empathizing with the user and solving their problem through a smooth yet fast UI. Here is the step by step for creating the front end of your No Code app.
Here are some No Code tools you can use for Front End development:
We talk about this tool a lot. But it is completely worthy of it. Bubble is a seamless No Code builder that would enable you to build your app regardless of your technical or academic background. You will have a visual UI builder with customizable functionalities. You can add and remove scalable features to your app within minutes.
Price: The free plan includes core platform features with Bubble’s branding. You can remove that with the $25/month plan.
Adalo is a No Code platform that can be used to build web and mobile apps without writing code. Some of the popular features like payment gateways, push notifications and forms are available in their template library as Drag & Drop Components. You can explore and utilize their full visual builder within less than a day.
Price: $50/month for publishing apps to Apple and Google Stores with 5 GB Data Storage.
Voila! You are ready to launch your app in your app store. We hope you learned something valuable from this blog.
If you are still confused between Code or No Code development for your app, you can take this Quiz.
For more information on No Code in general, its uses in other business spheres and its future, read our article on What is No Code.